How to Add Custom Code, JavaScript, and APIs in Webflow: A Comprehensive Guide
November 18, 2024
.svg)
.svg)
Webflow is celebrated for allowing users to create visually stunning, fully functional websites without the need for any coding. However, for developers or those looking for more advanced customization, Webflow offers a robust solution: the ability to add custom code, JavaScript, and integrate external APIs. This guide will walk you through how to implement these customizations to enhance your Webflow projects.
Why Add Custom Code to Webflow?
Adding custom code in Webflow can significantly extend your website’s functionality and customization capabilities beyond what the platform provides. Here are some key reasons:
1. Extended Functionality
While Webflow offers many features, custom code lets you go further by introducing:
- Custom JavaScript: For enhanced interactivity like form validation and dynamic content loading.
- Third-party APIs: Connect to external services like payment gateways or social media feeds.
- Custom HTML or CSS: Tweak elements that go beyond Webflow’s visual editor.
2. Personalized Design Elements
Custom code can give you greater control over styling and layout to meet specific design requirements:
- Add custom fonts or icons unavailable in Webflow’s library.
- Create advanced animations or transitions.
- Implement responsive behaviors optimized for different device sizes.
3. External Platform Integrations
Custom code is key for integrating Webflow sites with external platforms, such as:
- Marketing Automation Platforms (e.g., Mailchimp, HubSpot).
- Payment Processors that Webflow doesn’t natively support.
- CRM Systems and other business tools.
4. Overcoming Webflow’s Limitations
Although Webflow is a powerful tool, it has certain restrictions, especially with backend access and dynamic content handling. Custom code can help overcome these:
- Add dynamic filtering for content that responds to user inputs.
- Enable complex form submissions with custom logic or routing.
Where to Add Custom Code in Webflow
Webflow allows you to insert custom code in various places depending on your needs:
1. Site-wide Code
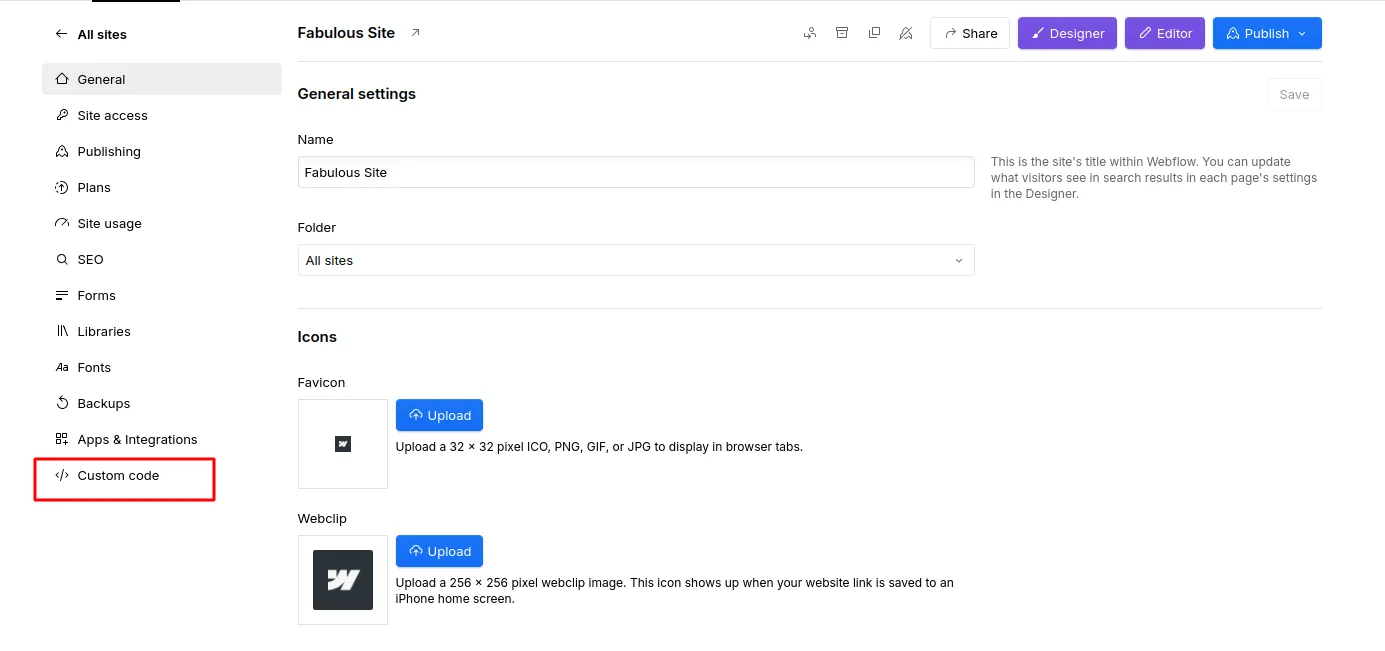
For code that impacts your entire website, such as analytics scripts, third-party integrations, or global styles, the best approach is to use site-wide code.
- Navigate to Project Settings > Custom Code.
- Insert your CSS into the Head section or your JavaScript into the Body section. This ensures the code runs across all pages on the site.

2. Page-specific Code
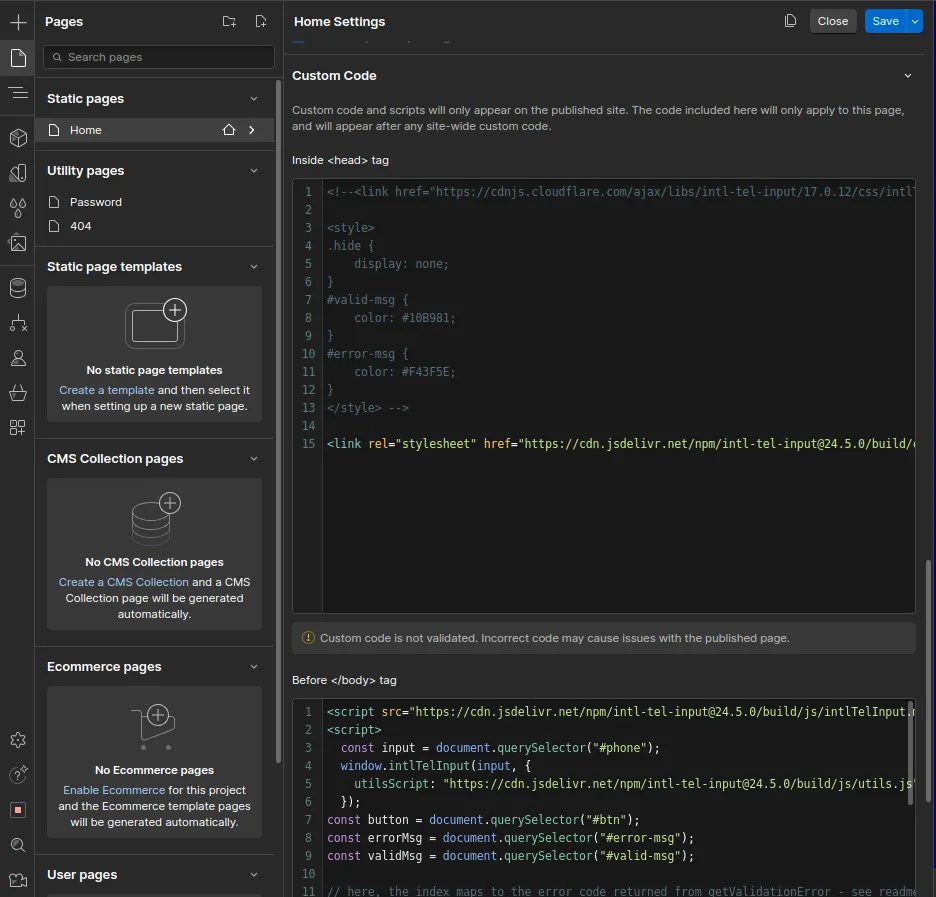
When you need custom code that only applies to a specific page, you can add it directly within that page’s settings.
- Open the Pages panel, select the page you wish to modify, and scroll down to the Custom Code section.
- Place your JavaScript or HTML code in the designated areas for that particular page.

3. Embed Code for Specific Elements
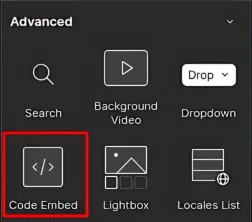
If you want to add code to a specific element on a page
(e.g : a widget, map, or button), Webflow’s Embed Element is a powerful tool.
- Drag the Embed Element into your design where needed, and paste your custom HTML, CSS, or JavaScript directly into the block to customize that specific area of your page.

How to Add Custom JavaScript in Webflow
JavaScript is a powerful tool that can bring dynamic, interactive elements to your Webflow site. Whether you're aiming to create animations, integrate forms, or connect with third-party services, JavaScript is your go-to solution.
Steps to Add JavaScript
1. Decide Where the Code Will Be Placed:
- Site-wide Script: If you want the script to run across your entire website, add it in the Project Settings.
- Page-specific Script: For a script that only applies to a single page, add it in that page’s Page Settings.
- Single Element Control: If the script controls a specific element, use the Embed Element.
2. Use External JavaScript Libraries:
Webflow supports various popular JavaScript libraries like jQuery (included by default), GSAP for animations, and Lottie for interactive animations.
- To include GSAP for animations, add the following script to the Head section of your Project Settings:
3. Integrate JavaScript Interactivity: Here’s an example of adding a fade-in effect when a user scrolls:
How to Add APIs in Webflow
APIs (Application Programming Interfaces) allow your Webflow site to communicate with external services, enabling advanced functionality like booking systems, weather data, or Google Maps integration.
Step-by-Step Guide to API Integration
- Understand the API: Before integrating an API, review its documentation for endpoint URLs, request methods, and the structure of the data you’ll be working with.
- Use Webflow’s Custom Code: Most API integrations require JavaScript, which you can insert using Webflow’s custom code areas. Here’s an example of making an API call using the Fetch API:
- Connect to External Services: Some APIs may require authentication, such as using API keys. Make sure to store these keys securely, either in environment variables or by embedding them safely.
- Use Webflow CMS with APIs: Webflow’s CMS collections allow you to dynamically load and display content fetched from an API. You can use JavaScript to fetch and insert API data into Webflow’s CMS.
Example: Google Maps API Integration
If you want to display a Google Map with custom markers, you’ll need to obtain an API key from Google Cloud Console. Then, add the following JavaScript code to your Webflow project:
You’ll also need to create an HTML container (e.g., #map) in your Webflow design to hold the map.
Benefits of Adding Custom Code
- Performance: Be cautious about overloading your site with unoptimized custom code, especially JavaScript. Compress your code, load scripts asynchronously (using async), and minimize external library sizes.
- Security: When working with custom code and APIs, ensure sensitive data like API keys is protected. Use secure methods for authentication, such as environment variables.
- Cross-browser Compatibility: Always test your site across various browsers and devices to ensure that your custom code performs as expected.
- SEO Impact: Make sure custom code does not negatively impact your site’s SEO. Minimize blocking scripts and provide fallbacks using tags like <noscript> for search engines.
Looking to take your Webflow projects to the next level? Hire Webflow Developers from our expert team to unlock the full potential of your website. Whether you need advanced customizations, seamless API integrations, or enhanced functionality, our skilled professionals ensure your Webflow site is optimized for performance, design, and interactivity. Partner with us to bring your vision to life with tailored solutions that meet your unique business needs.
Conclusion
Webflow’s ability to incorporate custom code, JavaScript, and APIs gives you the flexibility to push your website’s functionality and interactivity to new heights. Whether you’re looking to enhance user engagement, integrate external services, or add unique animations, custom code gives you full control. By following best practices, you can ensure that your customizations are efficient, secure, and compatible with SEO requirements.
Unlock the full potential of Webflow by embracing the power of custom code!


.svg)

.svg)


.svg)

.svg)


.png)
.png)
.png)

.png)
.png)

.png)
.png)


